What is Test Driven Development (TDD)?
Test Driven Development (TDD) refers to programminmg style, where feature development starts with coding a test. Once we have a failing test (this is necessary requirement, because we still don’t have a feature implemented) we proceed with feature development.
Test driven development phases
TDD consists of 3 phases:
- red (name comes from failing test)
- green (name comes from passing test)
- refactor
Those 3 phases are creating a cycle, which lead us to working feature with high-quality code.

During TDD development can be a few cycles. Unit test does not have to be fully prepared at the beginning in red phase in first cycle, but can be extended during second cycle or even in later onces.
Phase 1 (Green)
We must always start our work in TDD with this phase. It is important to remember that the test defining a future test should be failing. When you think about it, it is obvious becaue we don’t have feature implemented yet or we are just before updating the code.
It might also be, that code will not compile e.g. due to some missing methods.
Phase 2 (Red)
Next step is to develop a feature itself. The code does not need to be perfect, it only has to make the test passed.
Once it is ready, we should run not only test for our feature, but all the units tests. In this case we make sure, that our changes did not break anything.
Phase 3 (Refactor)
In this phase, we refactor our code. The code should be as minimal as possible to make the unit test passed.
It is required to run all unit tests at the end of this phace, to make sure that refactoring did not break application.
TDD usage example
Let’s say we want to manage children class in school. As a beginning, we were told to prepare a feature to involve and count children in class.
Cycle 1
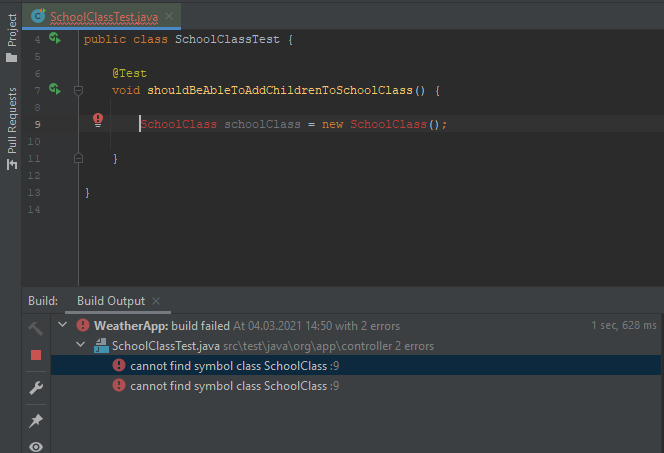
As described above, the proces of development should be started with failing test (phase red). Let’s think what we need. After a while we came to the point that we need class for representing a school class.
package org.app.controller;
import org.junit.jupiter.api.Test;

public class SchoolClassTest {

    @Test
    void shouldBeAbleToAddContactToBook() {

        SchoolClass schoolClass = new SchoolClass();

    }

}
It is important, that the test is failing in this phase.
Once we have the test prepared, we can go to phase 2 (green). To make the test passed, we simply need to create class SchoolClass.
package org.app.controller;

public class SchoolClass {
}
It is enough to have the test passing, that is why we don’t need more code for now.
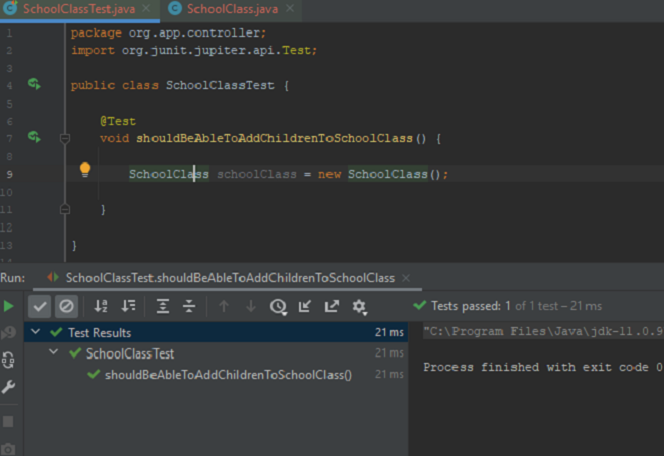
Once the test passed, we are done with phase 2 (green).
Phase 3 (refactor) can be skipped in this cycle, because there is nothing to refactor. It means that we are done with first cycle and we can go with second cycle. Let’s develop further the test.
Cycle 2
package org.app.controller;
import org.junit.jupiter.api.Test;

public class SchoolClassTest {

    @Test
    void shouldBeAbleToAddChildrenToSchoolClass() {

        SchoolClass schoolClass = new SchoolClass();
        schoolClass.addChild("Jack");

    }

}
The test will fail now, because SchoolClass does not have addChild method implemented.
Let’s add now addChild method in SchoolClass:
package org.app.controller;

public class SchoolClass {

    public void addChild(String childName) {

    }

}
Notice that there is addChild method defined, but body of it is empty. It has to be like that, because it is enough to make the test pass.
Phase 3 (refactor) also in this cycle can be skipped, because there is no need for refactoring.
Cycle 3
Let’s start third cycle.
package org.app.controller;
import org.junit.jupiter.api.Test;
import org.junit.jupiter.api.Assertions;

public class SchoolClassTest {

    @Test
    void shouldBeAbleToAddChildrenToSchoolClass() {

        SchoolClass schoolClass = new SchoolClass();
        schoolClass.addChild("Jack");

        Assertions.assertEquals(schoolClass.getChildrenNumber(), 1);
    }

}
As you can see, the test is now fully ready to check the functionality of adding a child to the class.
Test is failing, so we are ready to go to phase 2.
package org.app.controller;

import java.util.ArrayList;
import java.util.List;

public class SchoolClass {

    private List childrenList = new ArrayList<>();

    public void addChild(String ChildName) {
        childrenList.add(ChildName);
    }

    public int getChildrenNumber() {
        return childrenList.size();
    }

}
The test is passing, so the whole concept of functionality is working fine
Next phase is refactoring. Parameter ChildName in addChild method does not meet Java convention, that is why small correction is needed.
package org.app.controller;

import java.util.ArrayList;
import java.util.List;

public class SchoolClass {

    private List childrenList = new ArrayList<>();

    public void addchild(String childName) {
        childrenList.add(childName);
    }

    public int getChildrenNumber() {
        return childrenList.size();
    }

}
That would be it. Add children to school class functionallty is ready and unit test for checking that is also there.
Why to use TDD?
TDD forces developers to define clear goal and think about the code . Thanks to that, there is a clear view on what we need to implement.
Moreover, the code is immediately tested within our needs and therefore less buggy.